Today I am co-hosting a baby shower for my friend Katie. Each host has their assignment- invitations/decor, gift, drinks, snacks. Being the "baker" of the group, I agreed to making the sweets. And since I'm always up for a good challenge, I thought this would be time to make Petit Fours. It's an afternoon shower, and they seemed like the perfect sweet treat to have with a cucumber sandwich and a glass of champagne punch.
I spent almost two weeks researching recipes and techniques. I shopped for all the tools. I even made a test cake to make sure the recipe I picked would be suitable for this project. (God bless Bakerella- you just can't go wrong using her recipes.) The one thing I was not able to do though was practice the art of "dipping". I had been sick all week, and lost steam on Sunday after making the cake. So I went into it blind last night when I finally got to that step.
There are no pictures to document this process. In hindsight, I'm disappointed that I didn't at least enlist Hank to take some of the carnage. There was no way I could have stopped to do so. There was too much icing on my fingers, and too much grumpy on my face. These little delicate takes are so tedious and time consuming to make, that you just can't stop to take pictures.
But I will share my hits and misses in case you
Things you should definitely do first:
1. Watch the video from this Sprinkle Bakes post. It's misleading in that the jaunty little music and quick recap of the process make it LOOK like this is no big deal to pull off. But it's very helpful to see how to make the poured fondant, and how she dips and then pours them. I did not use her cake recipe, so the first part of the video is irrelevant.
2. Read in full the Petit Four post on Vegan Yum Yum. No- I did not make vegan cake, but Bakerella referenced this site in HER petit four post, and it was very helpful. The pictures for quartering, then halving the cake was spot on. (She uses the same poured fondant recipe as Sprinkle Bakes- this one seems to be pretty standard.)
3. Use the Cream Cheese Pound Cake recipe from Bakerella. It is hands-down the most delicious cake. Moist, but dense enough to stand up to this process. I think using a traditional white cake would have made them fall apart.
Things that I learned AFTER the entire process:
1. The Bakerella recipe calls for 1 cup of milk, but she mentions that she ended up not using it for the jelly roll/petit four experiment. I used 1/2 cup of milk and it was the perfect amount. Without it, I found the batter was too difficult to spread, and made for very uneven cakes.
2. While round cakes may be prettier, I think they are much harder to evenly ice. Should I lose my mind enough to do this again, I'll stick with square petit fours.
3. It will take you 2-3 days to make these. I baked the cake on Thursday, did all the slicing, jellying, and marzipan topping, and let it refrigerate overnight. I took it out in the afternoon to come closer to room temperature on Friday, and then went through the dipping process Friday evening (with the support of a dear friend who was kind enough to spend her Friday evening helping me.) We made the fondant flowers on Friday evening and then I attached them on Saturday morning. I would suggest making the flowers the same night as the cake so they could be added after icing them.
4. Know that you are going to make a ridiculous mess, and that every ounce of your patience will be tested. Pour a glass of wine (or 3), put on some music, have a friend there to support you. It's not an easy process. Use the ugliest cakes first to get the hang of dipping, and save the most even/pretty ones for last when you think you finally have the hang of it.
5. The poured fondant was pretty spot on, but I found that adding about a tablespoon or two of water after it has gone through the food processor, made for a smoother dip. And yes- you need to be near the microwave. You want the fondant warm- it makes it so much easier to work with.
Here is my final result. I'm hoping to have some prettier pictures from the shower itself, and I'll share those on my next post when I show you the decorated sugar cookies that I was making at the same time as these. Yes, I'm crazy.
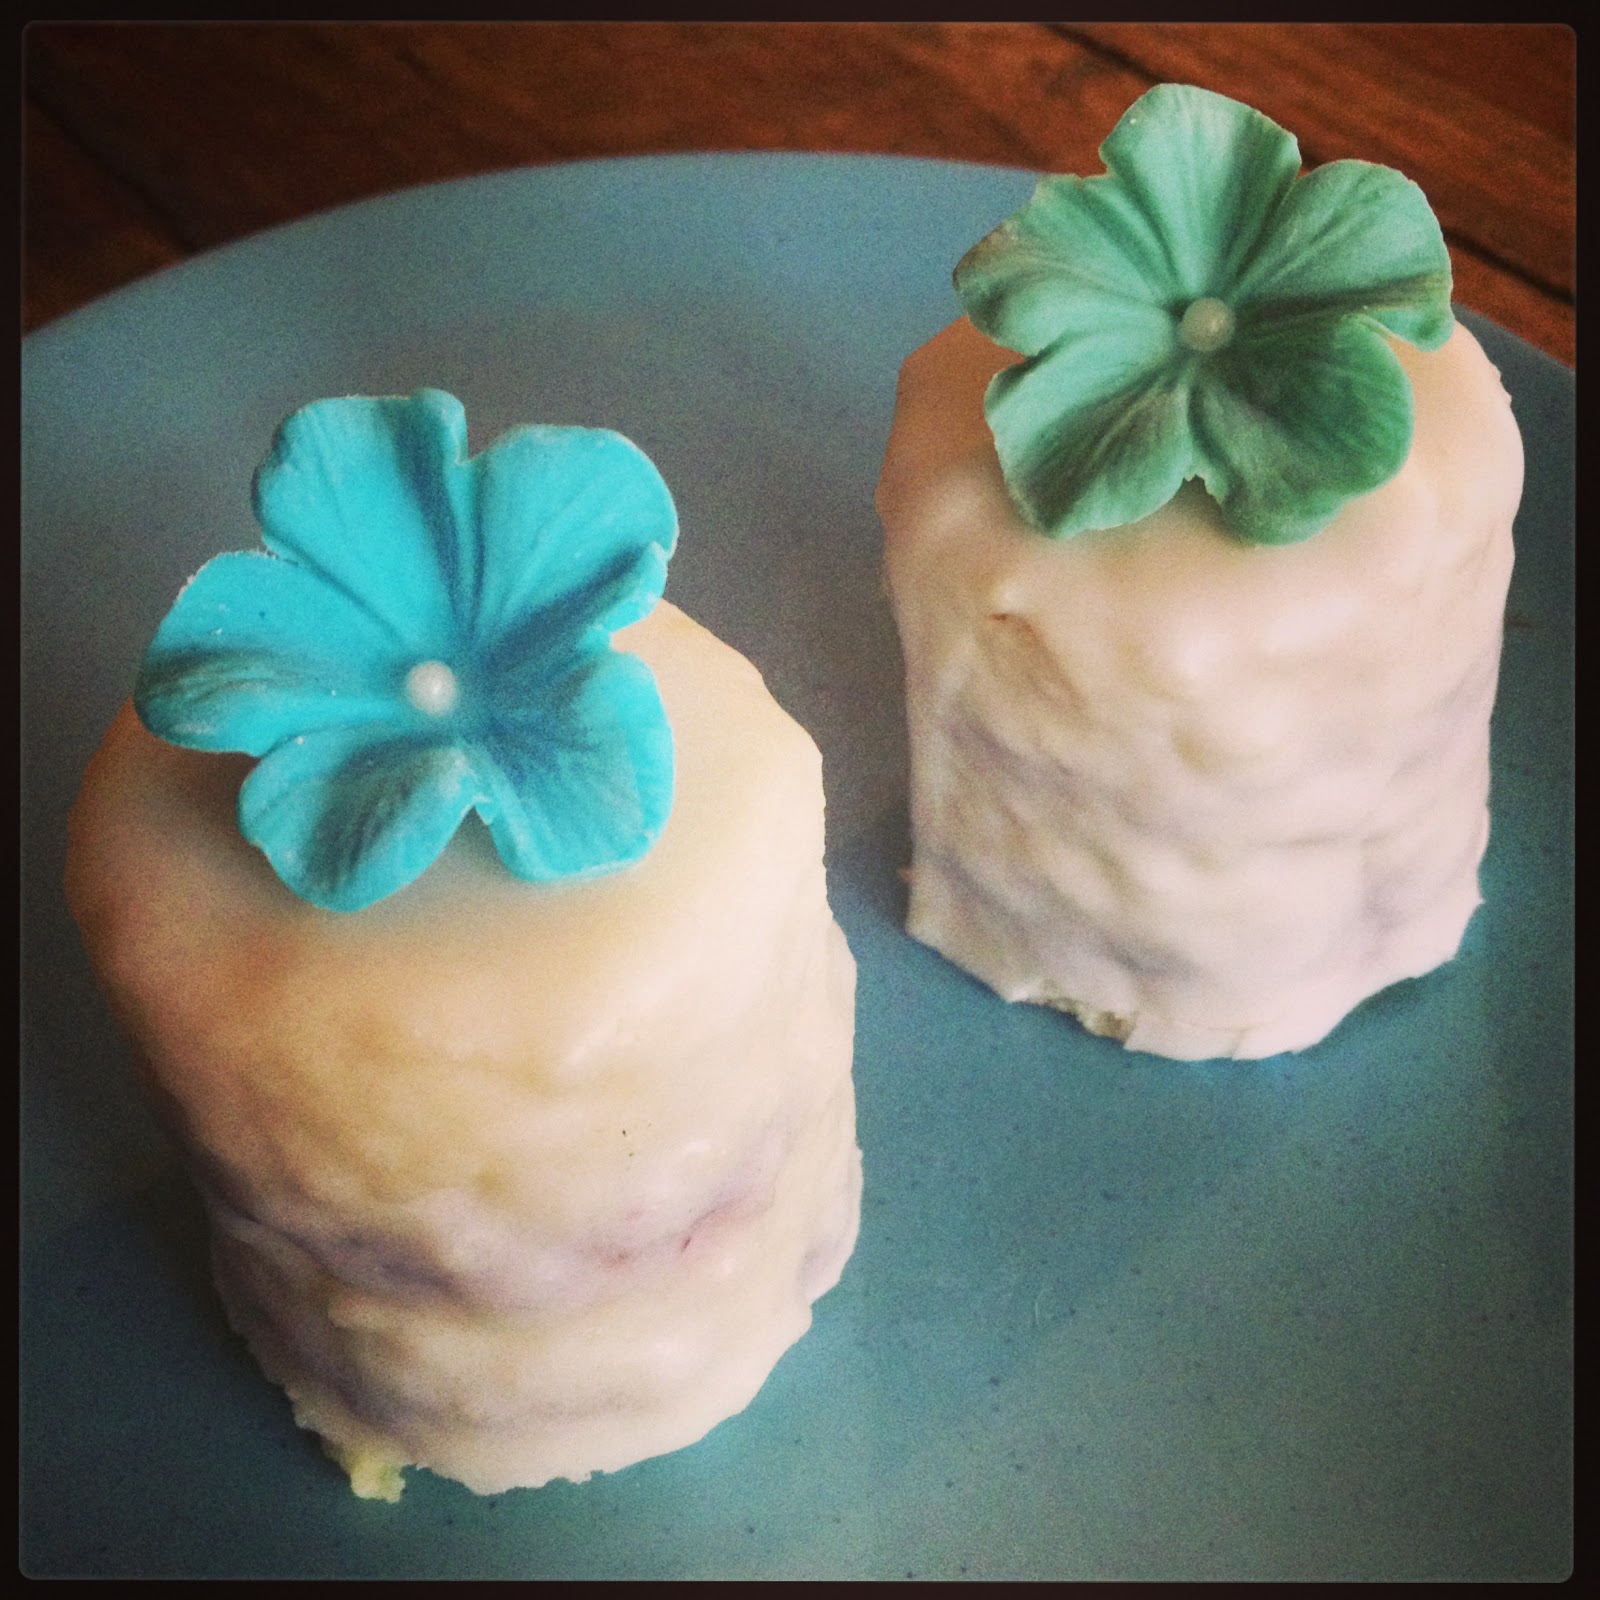 |
| Blue and green flowers to match the party theme. |
 |
| Not quite perfect, but at least I know they taste amazing. That's all that counts in the end, right? |
No comments:
Post a Comment