Showing posts with label baking. Show all posts

Monday, March 11, 2013

In the Kitchen: Onesie Sugar Cookies

I mentioned in my last post that we hosted a baby shower for a friend on Saturday. I made Petit Fours to serve at the party, but wanted to try something out from the Decorating Cookies book that I got for Christmas. I found the most adorable Onesie sugar cookies, and knew they would make perfect party favors.

Now- I will take NO credit for being creative. That's what my mom and sister are for. What I excel at is execution. Give me the idea, and I'll make it happen. I was not thrilled with the dough recipe from this book, and will be on the search for another one next time I decide to make cookies. But the royal icing recipe was perfect, and the book has some really great tips for decorating. I learned a ton just reading through the first section.

Luckily my friend Shelly agreed to come over to help me on Friday night. I had already spent most of Wednesday and Thursday getting the baking part out of the way, but the bulk of the work was for night #3. I would have been up until 3 in the morning if it wasn't for her help, and I am so grateful. We've taken a cake decorating class before, and we both love anything to do with baking, so it was a lot of fun drinking wine and having some girl talk while absolutely destroying the kitchen. The end result was  perfect, and I'm looking forward to trying my hand at other themed decorations.

My sister-in-law took some fabulous pictures from the party and posted them on her blog. Feel free to hop on over to this post to take a look. If I say so myself, the girls in my family can throw one heck of a party. I thought everything turned out great and it seemed like everyone had a good time!

Day 2- white flooding is done.

3 different designs in colors to match the party theme.

Cookies for miles. 


The finished product.


Saturday, March 9, 2013

In the Kitchen: Petit Fours

Petit Fours are the devil. They tempt you with their delicate shapes and frosting, and the moist, delicious inside. They trick you into thinking that you just might be able to make them. And you can, but you'll pay a price. I only wish I had the pictures to show you.

Today I am co-hosting a baby shower for my friend Katie. Each host has their assignment- invitations/decor, gift, drinks, snacks. Being the "baker" of the group, I agreed to making the sweets. And since I'm always up for a good challenge, I thought this would be time to make Petit Fours. It's an afternoon shower, and they seemed like the perfect sweet treat to have with a cucumber sandwich and a glass of champagne punch.

I spent almost two weeks researching recipes and techniques. I shopped for all the tools. I even made a test cake to make sure the recipe I picked would be suitable for this project. (God bless Bakerella- you just can't go wrong using her recipes.) The one thing I was not able to do though was practice the art of "dipping". I had been sick all week, and lost steam on Sunday after making the cake. So I went into it blind last night when I finally got to that step.

There are no pictures to document this process. In hindsight, I'm disappointed that I didn't at least enlist Hank to take some of the carnage. There was no way I could have stopped to do so. There was too much icing on my fingers, and too much grumpy on my face. These little delicate takes are so tedious and time consuming to make, that you just can't stop to take pictures.

But I will share my hits and misses in case you are crazy enough decide to make them on your own.

Things you should definitely do first:

1. Watch the video from this Sprinkle Bakes post. It's misleading in that the jaunty little music and quick recap of the process make it LOOK like this is no big deal to pull off. But it's very helpful to see how to make the poured fondant, and how she dips and then pours them. I did not use her cake recipe, so the first part of the video is irrelevant.

2. Read in full the Petit Four post on Vegan Yum Yum. No- I did not make vegan cake, but Bakerella referenced this site in HER petit four post, and it was very helpful. The pictures for quartering, then halving the cake was spot on. (She uses the same poured fondant recipe as Sprinkle Bakes- this one seems to be pretty standard.)

3. Use the Cream Cheese Pound Cake recipe from Bakerella. It is hands-down the most delicious cake. Moist, but dense enough to stand up to this process. I think using a traditional white cake would have made them fall apart.

Things that I learned AFTER the entire process:

1. The Bakerella recipe calls for 1 cup of milk, but she mentions that she ended up not using it for the jelly roll/petit four experiment. I used 1/2 cup of milk and it was the perfect amount. Without it, I found the batter was too difficult to spread, and made for very uneven cakes.

2. While round cakes may be prettier, I think they are much harder to evenly ice. Should I lose my mind enough to do this again, I'll stick with square petit fours.

3. It will take you 2-3 days to make these. I baked the cake on Thursday, did all the slicing, jellying, and marzipan topping, and let it refrigerate overnight. I took it out in the afternoon to come closer to room temperature on Friday, and then went through the dipping process Friday evening (with the support of a dear friend who was kind enough to spend her Friday evening helping me.) We made the fondant flowers on Friday evening and then I attached them on Saturday morning. I would suggest making the flowers the same night as the cake so they could be added after icing them.

4. Know that you are going to make a ridiculous mess, and that every ounce of your patience will be tested. Pour a glass of wine (or 3), put on some music, have a friend there to support you. It's not an easy process. Use the ugliest cakes first to get the hang of dipping, and save the most even/pretty ones for last when you think you finally have the hang of it.

5. The poured fondant was pretty spot on, but I found that adding about a tablespoon or two of water after it has gone through the food processor, made for a smoother dip. And yes- you need to be near the microwave. You want the fondant warm- it makes it so much easier to work with.

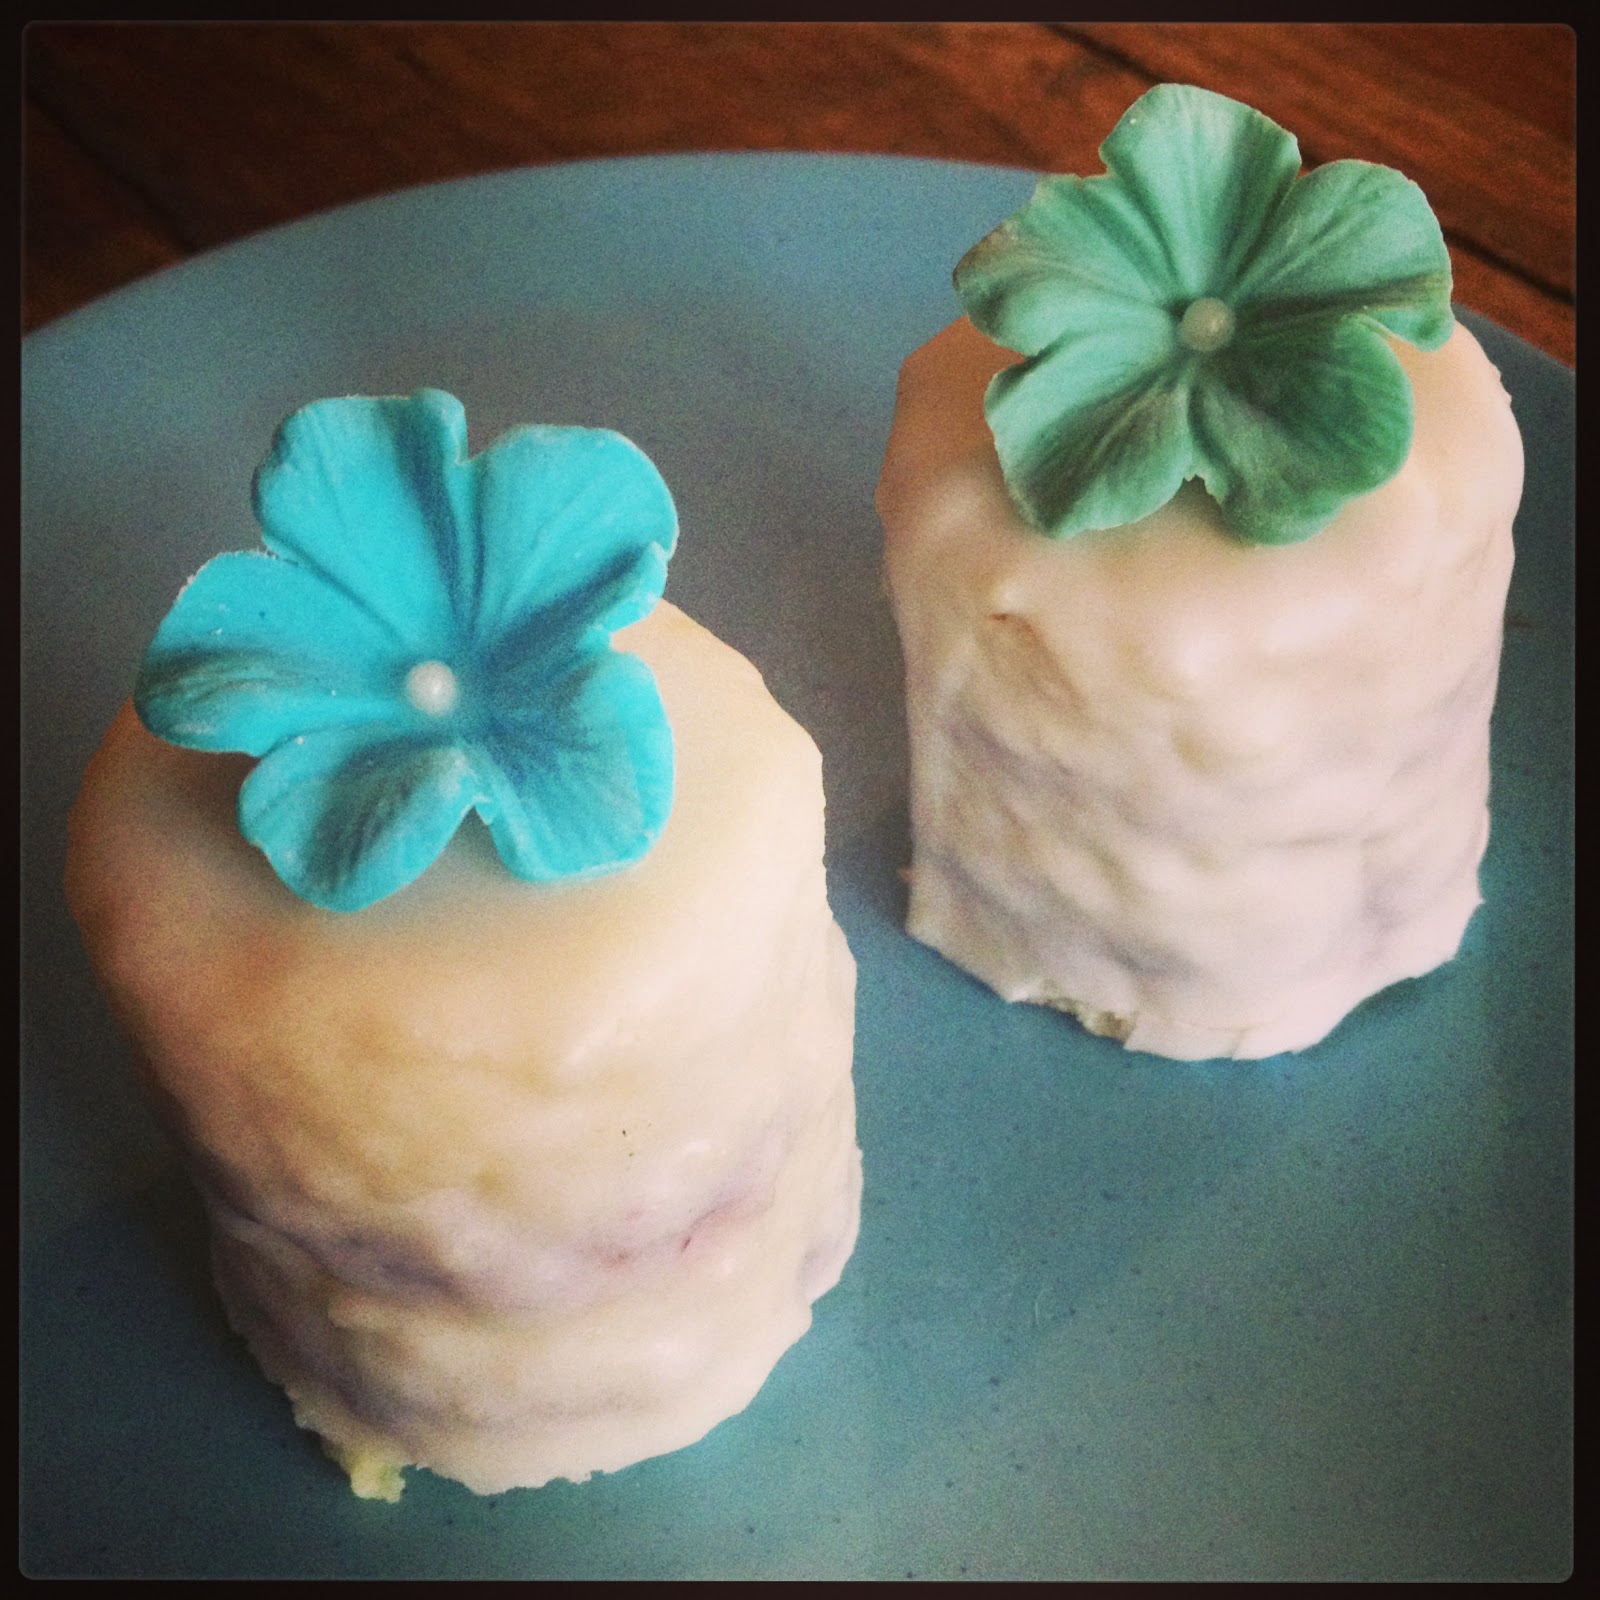
Here is my final result. I'm hoping to have some prettier pictures from the shower itself, and I'll share those on my next post when I show you the decorated sugar cookies that I was making at the same time as these. Yes, I'm crazy.

Blue and green flowers to match the party theme.


Not quite perfect, but at least I know they taste amazing. That's all that counts in the end, right?


Monday, October 22, 2012

Pixies and Pirates- A 3rd Birthday Party

On Saturday we celebrated my niece Georgia's 3rd birthday party with a Pinterest-worthy Tinkerbell extravaganza. She has been looking forward to this party for months, and my sister must have been planning it for months considering all the cute little details she pulled off. My one and only job was to make her a cake, and I've been stressing out about it for weeks. I had a vision in my head, but most importantly- I wanted it to be something that tasted good too. I tried out two different white cake recipes (the second one was sheer perfection), and I think the overall product got a B+. Most importantly though, Georgia absolutely loved it. So no amount of self critiquing really mattered since she was happy!

It's so hard to believe that 3 whole years have gone by. She continues to grow into this adorable, energetic little blonde curled cutie, and I'm so grateful to my sister and her husband for bringing her into our lives. But seriously, how do you get them to stop growing up so fast?!

1st Birthday
2nd Birthday
3rd Birthday

The birthday cake was a two-tiered traditional white cake with strawberry filling. I'm now pouring over videos on how to get buttercream frosting perfectly smooth (my cake- not so much). I'm a tad obsessed with it right now, and hopefully one day I'll figure it out. But the frosting was delicious (it tasted like vanilla ice cream) and I used a gum paste/fondant mix to make the flowers for the cake. I printed a silhouette of Tinkerbell, and filled it in with pink-tinted white chocolate that I then froze until minutes before I set the cake out. Her wand looked more like a sword, but overall at least you could tell who it was.

Tinkerbell cake.

Tinkerbell cupcakes.

Separate play area with dress up clothes and fairy houses to decorate.

One part of "Neverland".

Food table, complete with fruit skewers coming out of a log.

Peter Pan and Jelly and Enchanting Egg Salad Sandwiches.

Dew Drop Station.

When I took the picture below (on the right), it reminded me of a similar picture that I took last year when Georgia tried on her birthday present from me (a pink fairy outfit and a separate pair of ladybug rain boots). Both are adorable, but again illustrate how much she has grown this past year. 


Hank and I enjoying the party. This might be my favorite picture of the two of us so far. 

Monday, July 2, 2012

Make it Sweet: Rolled Buttercream Class

This past Saturday I met my friend Shelly at the Make it Sweet baking supply shop for a Rolled Buttercream class. You might be wondering what in the heck rolled buttercream is. I did too, until I started doing a little googling to get to the bottom of it. If you've ever had a cake with fondant, you know what a rolled icing looks like. It's hard, and doesn't really taste that great. Rolled buttercream is the same idea (decorating the top of a cake with one big sheet of icing), but the taste is better and it's supposed to be easier to work with.

I have never worked with fondant before (other than making some flowers), so I really didn't have a point of reference going into this class. I have, however, tasted it. That stuff is nasty, and leaves me with NO desire to spend the time decorating a cake with something that just doesn't taste good. I don't care how great the final product looks. When Shelly and I decided to take a class, we both wanted to try something that was new to us both, so this seemed like the perfect fit.

The class was a lot of fun (especially doing it with a friend) and I learned a lot. While my cake might not be the prettiest (I had a minor malfunction while outlining a piece of cardboard on the top), I think I can replicate the buttercream at home and give it another go. I like the shininess of the icing, and the taste was so much better! If you've ever wanted to learn more about cake decorating, Make it Sweet has a ton of great classes to choose from. I'll be going back again soon, for sure.

Got all my supplies ready...


Before


After

The final product after a few 4th of July inspired decorations

Laughing with Shelly right after she smashed icing on her apron, and just before her cake slid off the plate.
Good times!

Monday, May 14, 2012

Pretty in Pink Cupcakes

I've been on a bit of a baking binge lately. Work is driving me to insanity, and I guess in a way it's a relaxing distraction for me. I'll blame my sister for sending me the Ruffle Cake request. That's really what started it. Since then, I've made Irish Car Bomb Cupcakes, and these dainty little things for Mother's Day:


I found the cupcake liners at Bake it Sweet when I was picking up supplies for the ruffle cake. They just totally reminded me of my mom- so I had to get them. I also found the silver nonpareils there as well, and loved the different sizes. I knew it would be easy to come up with something pretty for Mother's Day. I tried a different piping technique than I usually use (starting from the center, working my way out) and love the look that it produced. I was really happy with the end product! They are just a simple white cake with a raspberry filling, and traditional buttercream on top. Simple, pretty, and oh so classy- just like my mom.

I've relied on youtube tutorials for the bulk of my decorating skills, but I'm really interested in taking a few classes. Bake it Sweet has a great schedule with tons of options, but I'm almost overwhelmed in finding a starting point. I started a Pinterest board just for cakes, and I'd love to try my hand at making some more difficult things, so I know a few classes would help. Stay tuned...as I'm not nearly finished in the kitchen.

Tuesday, May 8, 2012

Pink Lemonade Ruffle Cake

A few weeks ago, my sister emailed me a link to the picture below as she was beginning to plan for my niece's Baptism. She wanted to know if I could pull it off. At first, I just laughed. Because really...who am I to try and pull off a Martha Stewart cake?!


But then I started to think about the challenge. I love to bake, and I'm usually responsible for making/decorating family birthday cakes. I have just never tried anything quite like this. Bent on pulling it off, I set out to try a practice cake. I didn't necessarily want to follow her cake recipe, just the icing technique. So I chose to do Paula Deen's pink lemonade cake, and the swiss meringue buttercream from Martha Stewart. I had never made this particular icing before, but assumed from the picture that the consistency was what I needed to make such fluffy ruffles.

Results from round 1:


Swiss Meringue Buttercream is a big pain in my ass. The texture and taste were wonderful (not as sweet as traditional buttercream), and had a smooth, almost unnoticeable texture to it. But....directions said to keep it room temperature, so I did. And the result was droopy ruffles.

The cake was also too tart. I used 6 single packets of Crystal Light pink lemonade, and it was way too much. Back to the drawing board. For round 2, I decided to reduce the pink lemonade mix to just 4 packets, and go with a traditional buttercream. I found a recipe from Sweet Savory Life that had enough comments to convince me that it's the best buttercream ever. And they are right. This recipe is perfect!! I had also done some research on making flowers with fondant/gum paste. I thought the cake was a little boring, and wanted a way to dress it up a bit. The tutorial below helped immensely. She has a ton of other videos that I found really helpful as well.


Results from round 2:


I couldn't have been happier with the way the cake turned out. The buttercream helped keep the ruffles more defined (though I still had some temperature issues- you want to keep the icing cool enough to still be a tad firm.) I loved my flowers! All 3 were from my first attempt at making them. I used various sized round cutters, and a toothpick to frill the ends. You can't see it, but I also used the toothpick to make more realistic indentions on the flowers, too. Two of them have fondant ball centers, and one has some of the silver nonpareils.

The best part was that my niece adored her cake. All those hours of work were totally worth it when she kept saying "Georgia's pink cake". She could hardly wait to eat it.


Overall, it was a very special day for this very special girl. She was surrounded by friends and family who love her like crazy, and promise to support her as she grows.